Flash Tasmota firmware on the WiFi version of the Sonoff Zigbee Bridge Pro

This is a tutorial on how to flash Tasmota firmware on the WiFi version of the Sonoff Zigbee Bridge Pro.
Use this tutorial at your own risk. It's not my fault if you brick your device.
Notable Identifiers on the board
SN-NG-ZBP-01
WW220300
ZB Bridge-P
Front of board. A 5 pin header has been soldered on.

Back of board. I did some probing on the other pads just for fun, so ignore their ugliness.

Note: The USB port on the bridge will no longer work for data after this flash.
Hold down the button on the Arduino, plug it in, then release the button to wipe the Arduino. Unplug it before connecting it to the bridge, of course.
| Arduino Nano | ZPro |
| 3.3V | 3.3V |
| RX | RX |
| TX | TX |
| GND | GND |
| GND | GPIO00 |
Add a udev rule to allow user access to the port. Or run everything with sudo if you're feeling frisky.
sudo /etc/udev/rules.d/01-ttyusb.rules
SUBSYSTEMS=="usb-serial", TAG+="uaccess"
Reboot or reload udev rules
sudo udevadm control --reload
sudo udevadm trigger
Connect the nano via USB. Make sure the mini-USB cable you use is capable of data transfer. Try the example blink sketch to make sure.
use dmesg to make sure the OS sees and attaches the Arduino
sudo dmesg -w
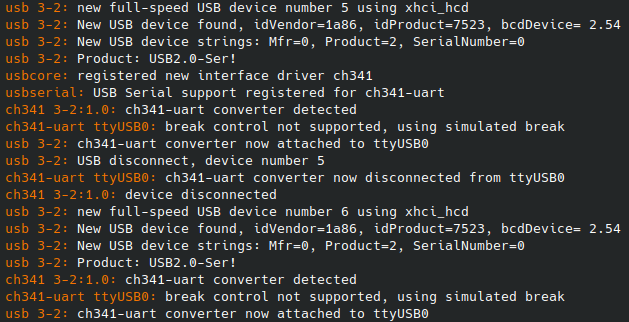
Note the attached port ttyUSB0. You'll need that in the next step.
Go to the Tasmota Web Flash Tool. I used Chrome. Select this firmware.

Click connect, and choose the USB device you saw in dmesg.

If the Arduino is properly connected, it will start the flash.
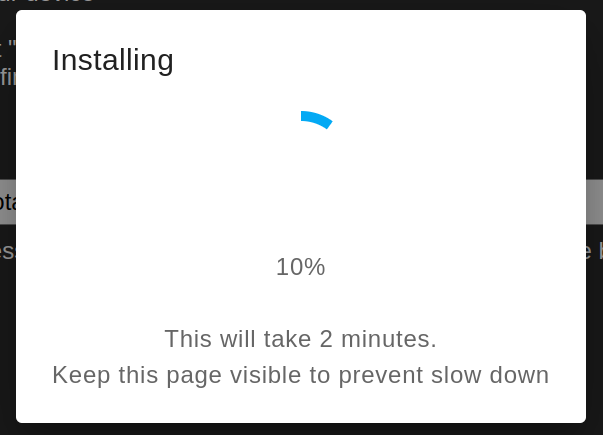
Once it's done, close the page and disconnect everything.
Connect a micro-USB to the bridge, wait for the lights to flash, and search for a WiFi access point.

go to 192.168.4.1 in your browser. Choose your WiFi network and log in.

After it connects, I'll give you the address assigned by your router.

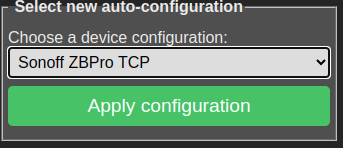
Reconnect to your regular WiFi network. In the web interface go to "Configuration" > "Auto-configuration" and select "Sonoff ZBPro TCP" and apply it. The config without "TCP" means the bridge will manage it's own zigbee connections. We'd rather HomeAssistant do that.
After the reboot, go to "Consoles" > "Console" and look for
Starting TCP server on port 8888
Now switch over to Home Assistant.
Go to integrations and click "Add Integration". Search for Zigbee.
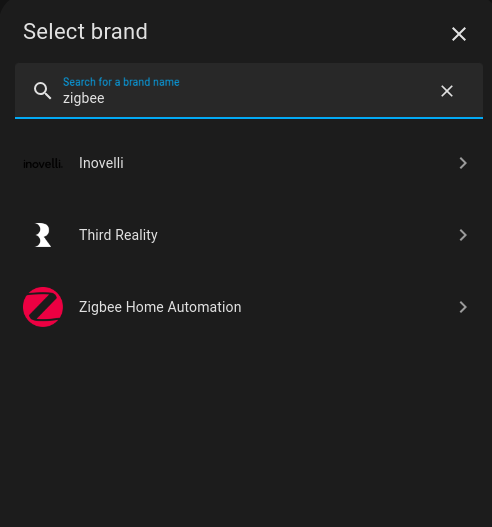
Make sure you use "Zigbee Home Automation" and not "Add a Zigbee Device"
Click Proceed
Select "Enter Manually" then Submit
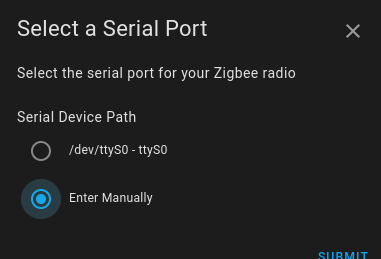
Select Radio Type "ZNP".

for Serial Port Settings, type in socket://10.10.10.153:8888 using whatever IP was assigned. Leave the Port speed, and select "software".

Select "Create a network"
Now, after a few minutes, a "Success" modal will appear along with all unpaired Zigbee devices HA has found. Do not add anything other than "Zigbee Coordinator" at this time.

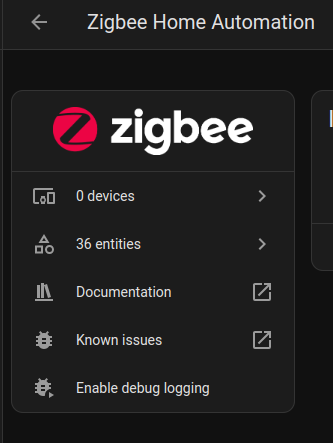
In HA go to Settings >Devices and services > Zigbee Home Automation
click "0 devices"
Then "ADD DEVICE" at the bottom right. Follow the prompts.
And we're done.