Flash Tasmota firmware to a Sonoff S31 Smart Monitoring Outlet using an Arduino Nano

DO NOT CONNECT THE SWITCH TO AC POWER AT ANY POINT THE CASE IS OPEN.

Bridge the Nano's GND and Reset pins.
The TX/RX pins don't need to be swapped.
| Nano | S31 |
| 3.3V | VCC |
| RX | RX |
| TX | TX |
| GND | GND |
Hold the button on the side, plug it into the computer, release the button after 5 seconds
sudo dmesg -w

/dev/ttyUSB0
Install the pyserial python module. Pip for most people, an AUR for Arch.
sudo pacman -S python-pyserial
Download the esptool to do the flashing
cd ~/Downloads && git clone https://github.com/espressif/esptool.git esp && cd esp
Download the tasmota firmware
wget http://ota.tasmota.com/tasmota/release/tasmota.bin
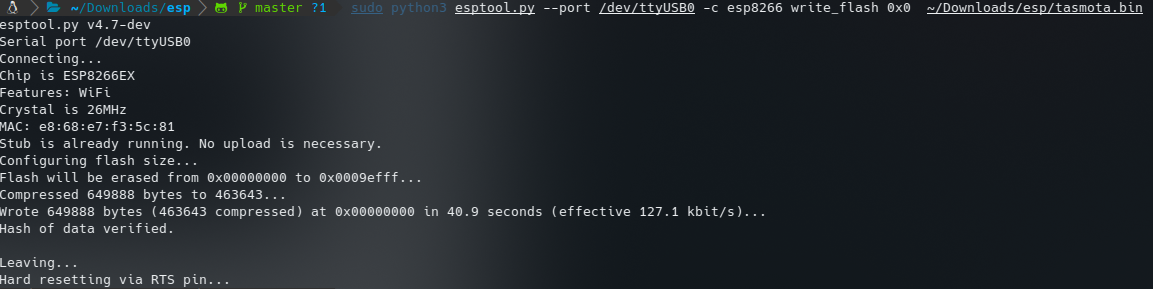
Check if your computer can talk to the ESP
sudo python3 esptool.py --port /dev/ttyUSB0 -c esp8266 flash_id
Anything other than this output means your wiring is wrong, or you didn't put it into programming mode (the button holding part)

Actually write the firmware.
sudo python3 esptool.py --port /dev/ttyUSB0 -c esp8266 write_flash 0x0 ~/Downloads/esp/tasmota.bin
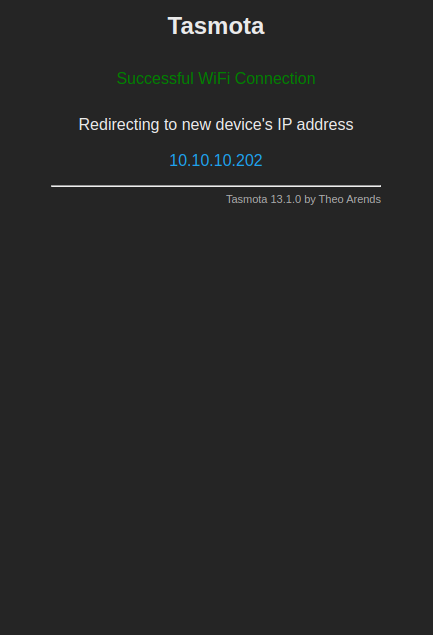
After it's done, connect to the new tasmota wifi network and go to this address.

https://192.168.4.1/

Go to your router and set a DHCP reservation.
Go to Configuration -> Configure Module -> Module type
- Change the module to "Sonoff S31 (41)"
Go to Configuration -> Configure Other
Change the Device Name and Friendly Name 1 to something else
"Sonoff-S31-A"
Go to Configuration -> Configure MQTT
- Input the settings that match your broker options in home assistant

Optional:
Login to your Home Assistant server and go to Settings > Add-Ons and click the Add-on Store button.
Search for “TasmoAdmin” in the search and then click on the “TasmoAdmin” add-on in search results.
In the add-on configuration disable SSL or it wont start.