Raspberry Pi Pico & Code-OSS on Archlinux - A Comprehensive Guide
I got really annoyed trying to figure out how to use the pico with vscode on arch, and I'm sure others are as well. Here's everything I did to get it working. I'll definitely forget all this so it def needed to be written down.
System Packages
sudo pacman -Syu --noconfirm git cmake gcc arm-none-eabi-gcc arm-none-eabi-gdb automake autoconf base-devel texinfo libtool libftdi libusb code minicom
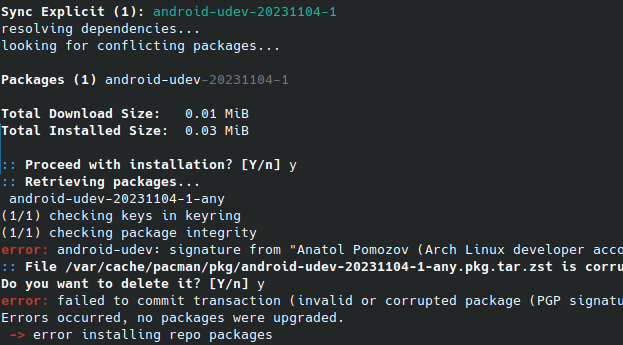
For some reason, I needed to import the Maintainer's gpg key.
gpg --recv-keys 92EDB04BFF325CF3
cd ~/Downloads && git clone https://aur.archlinux.org/gdb-multiarch.git && cd gdb-multiarch && makepkg -sri && cd .. && rm -rf gdb-multiarch
SDK install
cd ~/Development/Libs && git clone https://github.com/raspberrypi/pico-sdk.git
cd ~/Development/Libs/pico-sdk && git reset --hard origin/master && git submodule update --init && mkdir build && cd build && cmake .. && chmod -R 755 ~/Development/Libs/pico-sdk
build it, change 16 to however many cores you want to allow the compiler to use.
make -j16
Environment Variables
export PICO_SDK_PATH=/home/nathan/Development/Libs/pico-sdk
check the variable is set
printenv | grep PICO
make it persistent
nano ~/.zshrc
add export PICO_SDK_PATH=/home/nathan/Development/pico-sdk
then source it
. ~/.zshrc
if you screw up, unset the variable and restart this process.
unset PICO_SDK_PATH
VSCode
Extensions:
    code --install-extension marus25.cortex-debug &&
    code --install-extension ms-vscode.cmake-tools &&
    code --install-extension ms-vscode.cpptools
open vscode
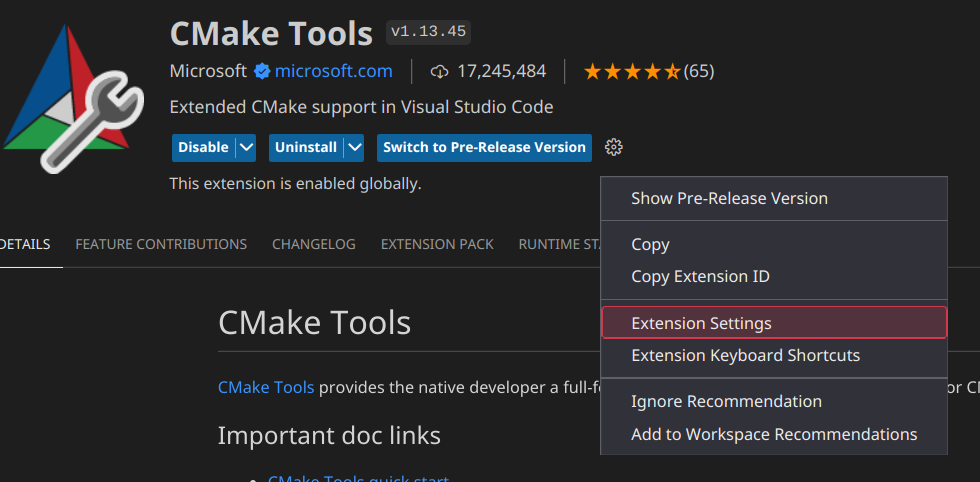
Click the Extensions button
Select "CMake Tools" under installed
Click the gear icon then "Extension Settings"
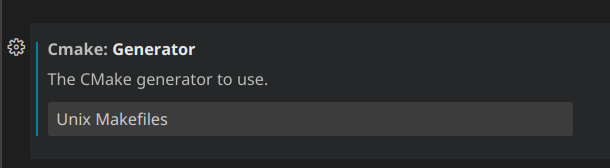
Scroll down to find "Cmake: Generator"
Paste in “Unix Makefiles”
Open a blank folder and create a file "main.c"
 #include <stdio.h>
 #include "pico/stdlib.h"

 int main() {

     const uint led_pin = 25;

     // Initialize LED pin
     gpio_init(led_pin);
     gpio_set_dir(led_pin, GPIO_OUT);

     // Initialize chosen serial port
     stdio_init_all();

     // Loop forever
     while (true) {

         // Blink LED
         printf("Blinking!\r\n");
         gpio_put(led_pin, true);
         sleep_ms(1000);
         gpio_put(led_pin, false);
         sleep_ms(1000);
     }
 }
create a file "CMakeLists.txt"
 # Set minimum required version of CMake
 cmake_minimum_required(VERSION 3.12)

 # Include build functions from Pico SDK
 include($ENV{PICO_SDK_PATH}/external/pico_sdk_import.cmake)

 # Set name of project (as PROJECT_NAME) and C/C++ standards
 project(blink C CXX ASM)
 set(CMAKE_C_STANDARD 11)
 set(CMAKE_CXX_STANDARD 17)

 # Creates a pico-sdk subdirectory in our project for the libraries
 pico_sdk_init()

 # Tell CMake where to find the executable source file
 add_executable(${PROJECT_NAME}
     main.c
 )

 # Create map/bin/hex/uf2 files
 pico_add_extra_outputs(${PROJECT_NAME})

 # Link to pico_stdlib (gpio, time, etc. functions)
 target_link_libraries(${PROJECT_NAME}
     pico_stdlib
 )

 # Enable usb output, disable uart output
 pico_enable_stdio_usb(${PROJECT_NAME} 1)
 pico_enable_stdio_uart(${PROJECT_NAME} 0)
restart vscode
*Note: #include will be squiggled until you build the project. You do not need to add any additional includes in the C/C++ or CMake tools.
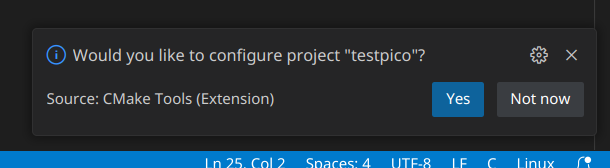
there will be a popup at the bottom right hand side when you reopen the project, click yes, then "Scan for Kits".
At the bottom of VS Code, you should see a blue status bar. At the bottom left, click "No active kit" then "GCC arm-none-eabi".
Click "Cmake: [Debug]: Ready" next to that, and select "Debug" This should run CMake and create a build directory in your project folder.
Click "Build" in the same status bar. This will call make to build your project. You should see new, compiled binaries appear in the build folder
cmake arguments
If you want to specify cmake options, like selecting a board:
Click the Extensions button
Select "CMake Tools" under installed
Click the gear icon then "Extension Settings"
Scroll down to "Cmake: Configure Args" and add your arguments there.

-DPICO_BOARD=pico_wClick press build as done before.
Install additional libraries using pico-arduino-compat
cd ~/Development/Libs
git clone https://github.com/fhdm-dev/pico-arduino-compat.git && cd pico-arduino-compat && git submodule update --init arduino-compat/arduino-pico
You'll need the exact library name for the Arduino library that you're planning to use.
I suggest the arduino app or cli.